
IRRIGATION / PRACTICAL GUIDES
Drip Irrigation for Raised Beds: Planning the Layout
By James Thompson
Some links in my articles are affiliate links. I may earn a commission when you buy through them.
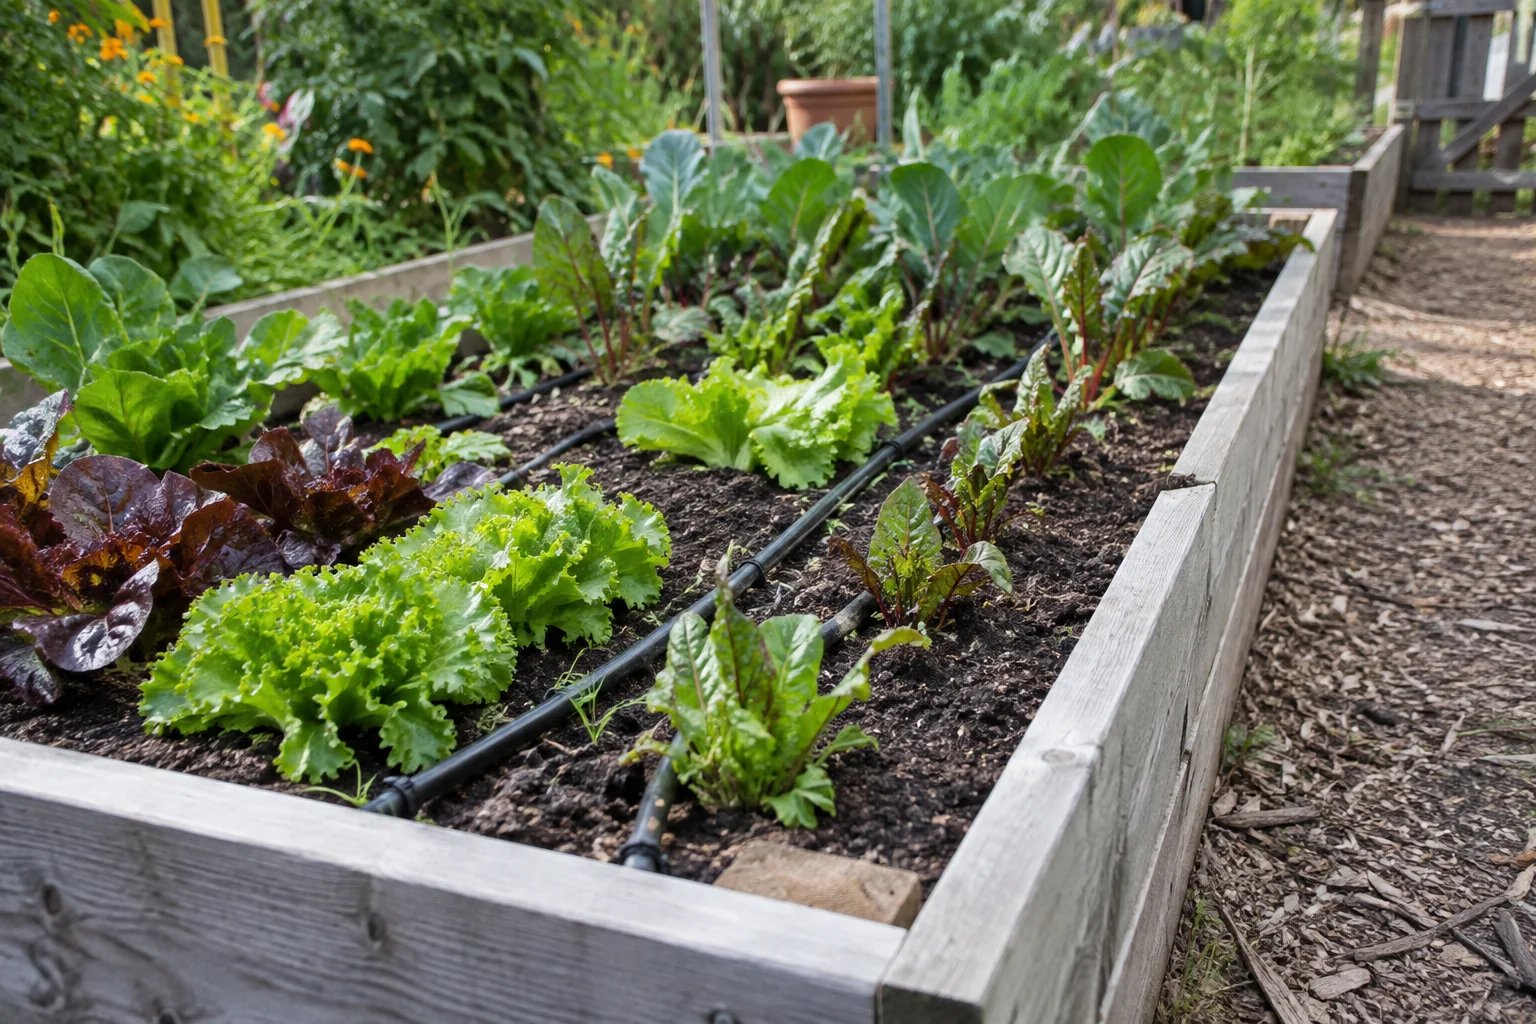
A raised-bed irrigation layout should suit the crops and leave room for planting, weeding and harvesting. Start by marking the planted rows and access points. Then decide whether individual watering points, a dripline or suitable small-area sprays will cover the root area you intend to water.
The practical answer
Map planted rows and access first, then choose a supply route and delivery points that wet the intended root zones without blocking cultivation. Check kit pipe length as well as the advertised plant count.
Useful product route: Hozelock 13 mm supply hose or Hozelock 4 mm T-piece connectors
Measure the bed and the route to it
Record the bed’s length and width, its height above the supply and the pipe route from the tap. Include changes of direction and crossings between beds. A kit described by plant count may not contain enough supply pipe for a distant bed.
Also mark where you can reach the inlet filter and the ends of the watering lines. Maintenance access is easier to include on a sketch than to recover once the bed is densely planted.
Choose a watering pattern
- Regular rows: compare purpose-made dripline with an appropriate emitter spacing.
- Widely separated plants: consider individual drippers placed at the required points.
- Closely planted areas: assess whether the selected outlets wet enough of the root area.
- Changing layouts: favour an arrangement that can be repositioned and inspected.
GARDENA separates its system applications into planted areas, planted rows and containers. That is a useful distinction when comparing sets. A terrace-pot kit and a vegetable-bed kit may contain different delivery components even if their headline sizes look similar.
Worked example: measure rows separately from the feed
Suppose your sketch shows a 1.2 m by 2.4 m bed with three proposed watering runs along its length. That is 3 × 2.4 = 7.2 m of row runs. It is not the complete shopping quantity: measure the route from the source, the connection across the bed, and the lengths needed to reach accessible ends separately.
| Record on the sketch | Why it changes the order |
|---|---|
| Three proposed 2.4 m runs: 7.2 m total | Estimates row tubing only; choose plain tube with outlets or suitable dripline deliberately. |
| Source-to-bed route and bed connections | Additional pipe and fittings, not part of the 7.2 m. |
| Crop positions and gaps between runs | Check wetting between lines; three runs may be insufficient or unnecessary. |
| Reachable line ends | Allow the selected system’s flushing and closure arrangement. |
This is a quantity example, not a tested irrigation design or recommended spacing. Confirm line lengths, emitter spacing, pressure and total flow against the chosen system, then test soil wetting before buying the same layout for more beds. If crops move next season, redraw their root areas before reusing the old routes.
Do not use one universal spacing
The suitable distance between lines depends on the irrigation product, the growing medium and the crop layout. Follow the selected system’s guidance, then check the actual wetted area in your bed. A damp spot immediately under an emitter does not prove that the whole intended root area is supplied.
For seedlings, established vegetables and mixed crops, monitoring matters as the season changes. The RHS vegetable watering guide explains why crop growth and conditions affect water demand.
Keep pipework manageable
Secure lines without trapping them under bed edges or stretching them across walkways. Leave enough room to remove line ends for maintenance. Protect open tube during installation so growing medium does not enter it.
Identify plain supply pipe correctly using our soaker hose and dripline comparison. Avoid punching random holes into plain tube as a substitute for designed emitters.
Commission one bed before expanding
Run a complete cycle and inspect several locations in the bed. Check the farthest outlet and all joints. Record the layout and runtime, then review them after planting changes.
If you are adding several beds, plan the watering zones before assuming they can all run together. The system’s permitted flow and pipe lengths must accommodate the completed layout, not only the first bed.
Product examples on Amazon
Compare these examples with your chosen manufacturer’s specifications before ordering. These are individual product examples, not a confirmed compatible bundle.
Hozelock 13 mm supply hose — view on Amazon
Check the pipe specification against your chosen fittings.Hozelock 4 mm T-piece connectors — view on Amazon
Check compatibility with your micro hose.
Explore all irrigation guides →
Sources
Choose compatible pipework
Compare irrigation tubing and fittings for your measured layout →