
IRRIGATION / PRACTICAL GUIDES
How to Set Up Drip Irrigation for Pots and Containers
By James Thompson
Some links in my articles are affiliate links. I may earn a commission when you buy through them.
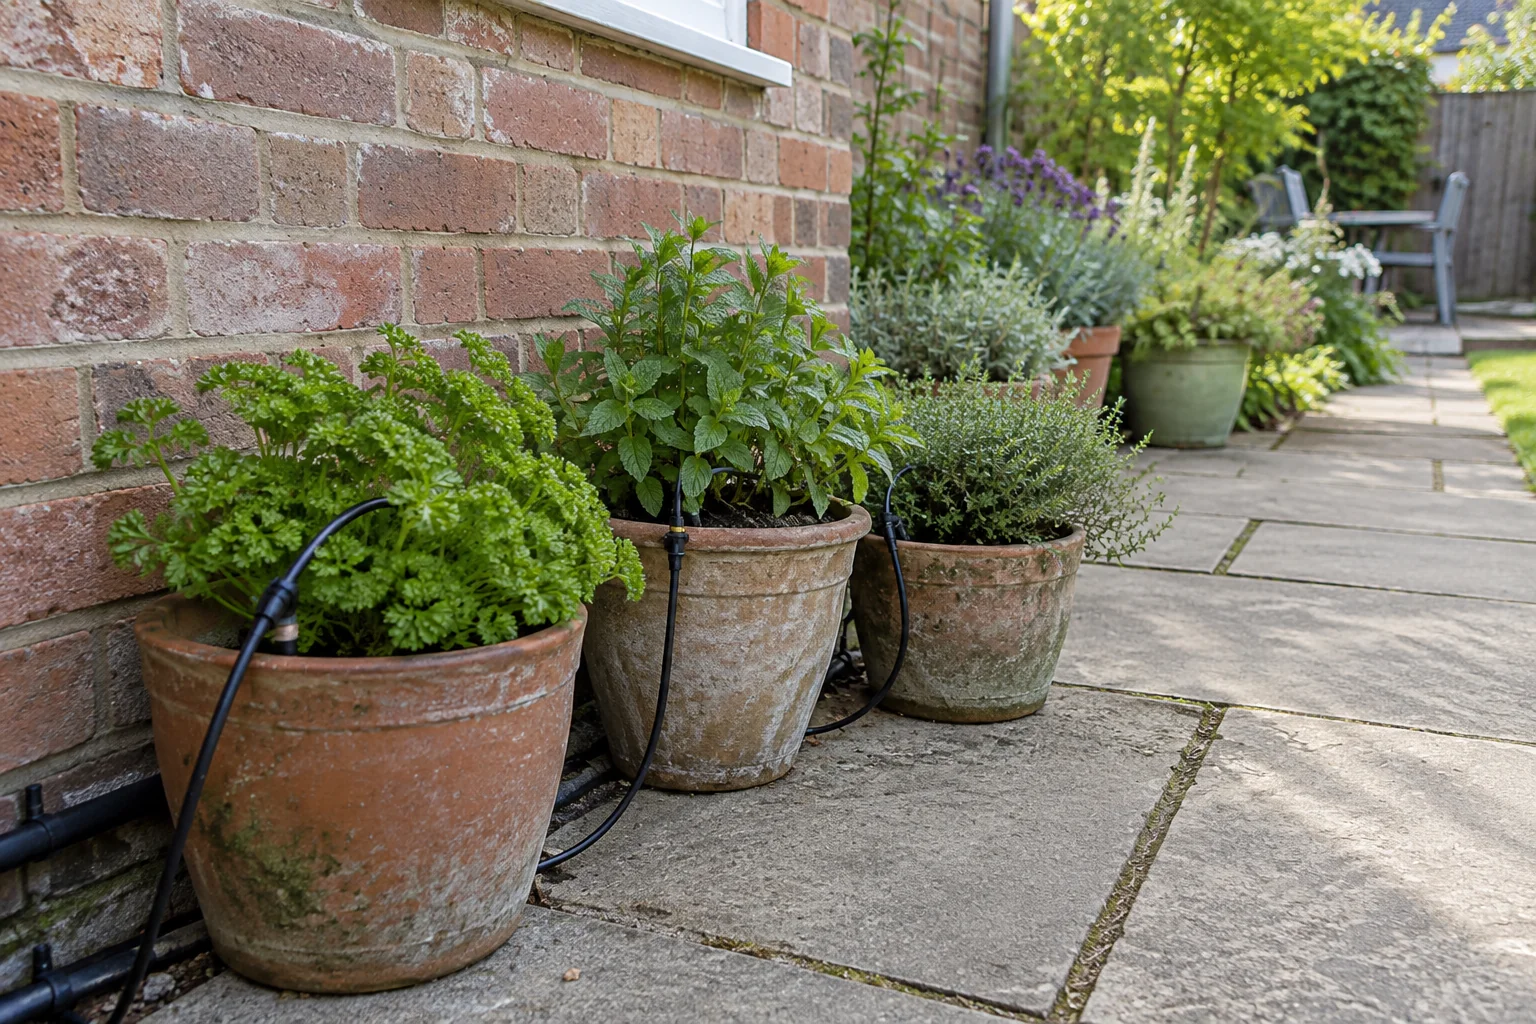
For patio pots, a useful drip layout keeps the main pipe tidy, supplies each container through a suitable branch and allows you to move or maintain pots without pulling connections loose. Plan around the final positions of the containers, not just the number of drippers in a kit.
The practical answer
Group pots with similar needs, run a stable main supply past them and keep branch tubes short enough for the selected system. A complete 20-pot kit is the clearest starting point when its controller and water-source requirements fit.
Useful product route: Hozelock 20-pot drip-watering kit or Hozelock 4 mm T-piece connectors
Group the pots before drawing the pipework
List the containers by size, plant type and exposure. A large sunny pot and a small shaded pot may need different water quantities even when they sit side by side. Consider which can share a watering duration and which need separate control.
The RHS recommends checking container compost and adjusting watering to conditions. An automatic system remains something to inspect; it does not measure every pot’s needs unless suitable sensing is actually part of the arrangement.
Seasonal planting may need a different routine from summer containers. Our guide to watering spring bulbs in pots explains what to check before including those pots in an automatic schedule.
Build a route that remains accessible
Place the main supply close enough to the pots to avoid unnecessarily long micro-tube branches. Hozelock describes its 4 mm hose as a route from the larger supply hose to individual watering components. Check the permitted lengths for the particular range you choose.
- Keep tubing clear of doors, wheels and regular walking routes.
- Leave enough slack for modest pot movement without creating large loops.
- Support outlets so they stay in their intended positions.
- Keep inlet equipment and the line ends accessible.
- Label branches if several pots look similar.
A six-pot setup record
For an illustrative patio with three sunny pots (A–C) and three sheltered pots (D–F), label the containers before installing anything. Those labels identify observation points; exposure alone does not establish a watering schedule. Record plant type, pot size and compost condition for each.
| Pot or group | Record before assembly | Record during the trial |
|---|---|---|
| A–C: sunny position | Measured branch routes; required outlet arrangement for each root area | Output collected for the same test duration; compost response in each pot |
| D–F: sheltered position | The same measurements, plus whether these pots can share the sunny group’s frequency | Check for pots remaining wet when others need another cycle |
| Whole route | Source connection, accessible closures and total outlet demand within system limits | Leaks, loose outlets, missed pots and unwanted runoff |
If pot F remains wet while A needs water, first check delivery and drainage. If their genuine watering frequencies differ, use separate control or water one group manually; simply turning down F’s flow does not necessarily solve a frequency mismatch. Recheck after moving a pot or changing an emitter.
Position water where the roots can use it
Aim the outlet onto compost within the pot, rather than against the rim or onto leaves. Watch the first run for water escaping over the edge. A large container may need a different outlet arrangement from a small one; follow the emitter instructions and inspect the wetted area.
Choose the emitter configuration using our inline and endline dripper comparison. Do not assume one dripper per pot is always sufficient, or that adding extra emitters is harmless to system capacity.
Test the system before setting a routine
Collect output from a few representative drippers for an equal time, including distant and elevated pots. Then run the system into the containers and inspect how their compost responds. Measured outlet volume and moisture in the pot answer different questions.
Start with an observed trial, record the duration and adjust one variable at a time. Check again after hotter weather, plant growth or a change in pot positions. Our water-use calculation guide helps translate rated flow into an initial estimate.
Make future changes straightforward
Photograph the route and retain the tube and fitting references. If you remove a pot, close its branch using the correct component instead of leaving a live outlet watering the patio. Recheck the complete system whenever you add containers.
Before a trip, use the holiday watering checklist to check the scheduled cycle as well as the pipework.
Product examples on Amazon
Compare these examples with your chosen manufacturer’s specifications before ordering. These are individual product examples, not a confirmed compatible bundle.
Hozelock 20-pot drip watering kit — view on Amazon
Compare the kit contents and controller with your layout before adding separate parts.Hozelock 4 mm T-piece connectors — view on Amazon
A branching-fitting example; check compatibility with your chosen micro hose.Hozelock in-line pressure-compensating drippers — view on Amazon
Check the connection size, rated flow and permitted pressure for your system.
Explore all irrigation guides →
Sources
Choose emitters for your containers
Compare fixed, adjustable and pressure-compensating drippers →